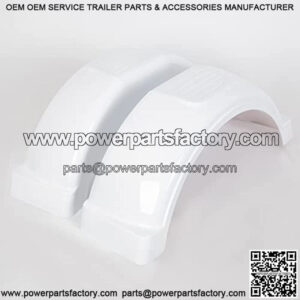
Trailer Fender Replacement
Installing or replacing a trailer fender can easily be accomplished by yourself with just a few basic tools. A fender can typically be mounted and replaced in under an hour. This article will go over the steps needed to install a new or replace an old fender.
Tools Needed:
Screwdriver or Welding Gun
Wheel Chock, 2×4 or Other Brace
Alligator Clamp, Vice Grip or a Friend
Tape Measure
Marker
Drill
Step 1: Remove the Old Fender
If you have a trailer without an old fender attached you can skip this step and go right to Step 2: Prepare the Trailer. If you do have an old fender on your trailer, it is most likely secured in 1 of 3 ways. The most common ways would be bolted on, bolted to mounting brackets or welded on. Each method of mounting provides its own set of challenges you may face, and will each be covered individually.
If your fender uses mounting holes/bolts or brackets:
The simple bolt on method can be both the easiest and hardest method to remove depending on the condition of the hardware used to attach the fender. If you are lucky enough to have good serviceable screws you can just remove them and save them for the replacement fender. Chances are however, that if you are replacing the fender, the bolts/screws are rusted, stripped or in some way degraded. There a few simple tricks with items found around the house that can help you remove those rusty screws.
Tips to remove rusted bolts: Use a dissolving agent of some kind (WD-40, lemon juice or regular cola will all work fine). Get some of the agent around the end of the bolt or screw and then tap the head with a hammer, which causes the screw to vibrate and seeps some of the dissolver into the screws threads, as well as loosens up any corrosion that has bonded between the trailer and fender. Allow it to sit for a few minutes then try removing the screw; a second application may be required.
If all else fails, you can use a screw extractor to drill into the top of the screw and create a deeper, sturdier screw head that can typically then be forced out with some muscle or power drill in reverse.
If you fender is welded on:
Removing a welded on fender can be a bit tricky. If it was attached correctly and welded well, it will be fixed quite snugly to the trailer body. Without the proper tools, this becomes a very labor intensive chore. If you have a weld remover that would be your first go to option. Just run the chisel along the current weld to break it up. You will need to run from end to end on both the top and bottom of the fender to get all the welds apart so that you can then remove the fender.
If you do not have access to this tool, you can either take it to a welding shop to have it removed (typically not too expensive). Or if you want to take care of it yourself, using a small chisel (or flat head screw driver you don’t want any more if you don’t have a chisel) and a small hammer, use the point of the chisel and hammer it lightly into the welds at the seams of the fender. This method is a last resort and should only be attempted if you are confident in the steadiness of your hand, and don’t have other options. If you can remove the bulk of the welding bead you should be able to then pop or pry your fender off. You should not have to apply a lot of force here, which could bend your fender, if it does not want to come off, check for more welds that you missed.
Step 2: Prepare The Trailer
If you have a brand new trailer, with no existing mounting holes or brackets this step will be pretty quick and easy. Either way, place a wheel stop of some kind on your wheels (a wheel chock or simple 2×4 would work) to keep the trailer stable while working.
If using mounting holes:
If you plan on mounting your trailer with mounting holes, you will want to hold the fender up to the trailer body and use your clamp/friend to hold the fender in place just above where you want your fender to sit. Allow for the mounting lip (typically 1” long) so staging the fender 2” above the wheel well works great.
While it is held in place measure the distance from either end of the fender to the wheel well, and center the fender so that both ends are an equal distance from the well. Then use your marker and mark a few spots to place your mounting holes on the trailer body (one at either end, one to three along each arch depending on length and one or two near the center). Then mark a spot vertically center on the fender itself right above the dot on the trailer body. Doing this right at the base of the mounting lip as it is staged, will cause the fender to mount just a ½” above your wheel well if you center your screws on the fender when mounting.
If using mounting brackets:
When mounting your fender using a bracket attached to the trailer body, you will want to hold the fender up to the trailer body and use your clamp/friend to hold the fender in place right where you want your fender to sit. If you have existing brackets your fender should sit centered and in line with both brackets ready to be fixed on. If you are fixing new brackets to your trailer, hold the fender in place, and using your marker, draw a small straight line either vertically or horizontally, depending on how your brackets attach to the trailer body for mounting.
Step 3: Mounting Your Fender
If using mounting holes:
Go ahead and remove the clamps, and using your drill, make the holes in the trailer body and fender body right on those dots you just placed. Then it is as simple as lining up the holes on the trailer and fender and screwing them together (once it is lined up or to help line up the holes, using the clamps again might help to hold it in place so you can get those screws in. You will want to get all the screws in, then go back and make sure they are all tightened down once all are fixed in place.
If using mounting brackets:
Hold the fender up between your lines and double check before bolting on the brackets that your fender fits between those lines, centered over the wheel well. You can remove fender, and will want to line up the mounting face of your bracket right on the line you just marked. Secure the bracket to the trailer body on both ends of the wheel well along your marked line, and then bolt the fender to the bracket.
If welding your fender on:
Use your brackets to hold the fender in place where you need it mounted, and run a light weld along the base of the mounting plate to help hold it in place (the E6013 is a perfect electrode for this job), and then repeat along the top of the mounting lip with a heavier bead. Let your welds set and then run through and check for missed spots or thin beads and touch up where required.
About Trailer Fender
“trailer fender replacement”
“trailer fenders tandem”
“square trailer fenders”
“trailer fenders amazon”
“small trailer fenders”
“steel trailer fenders”